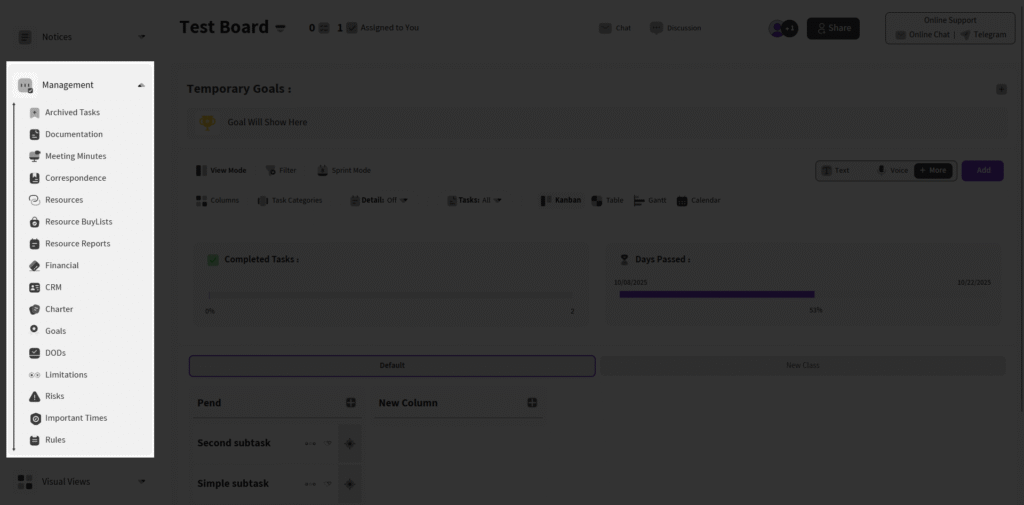
The Management section in the sidebar offers comprehensive tools for organizing project documentation, resources, reports, and compliance, ensuring smooth oversight and tracking.
Archived Tasks #
This section stores tasks that have been archived by an admin or owner (via the Archive option in the task’s top menu), keeping them out of active view while preserving them for reference.
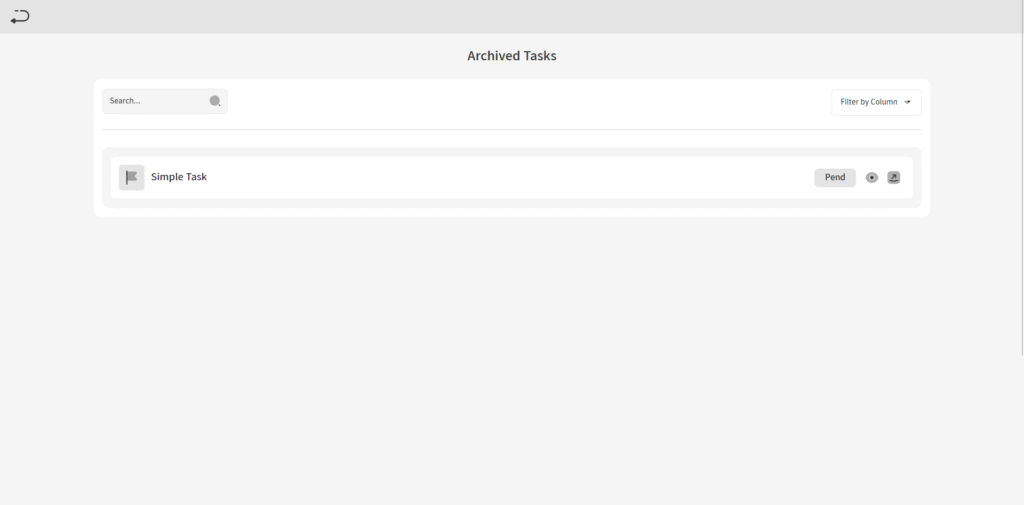
you can search from your tasks or filter them by column
Documentation #
In this page, you can create new documents and organize them by Category within this section only (Categories are unique to Documentation and not available elsewhere). Once created, documents can be used in the Correspondence section. After adding, you have options to Edit or Delete them.
Meeting Minutes #
Here, you can schedule a meeting for a specific time and enter the location in the Meeting Location field. Add Meeting Commands and Meeting Subjects, and specify Meeting Members. You can also set Meeting Approvals for specific tasks (click Add New next to Meeting Approvals, then enter the task name in the Task Name field). Finally, write a Meeting Summary and attach images.
Correspondence #
Here, you can add a Correspondence by entering the subject in the Subject, selecting a category, choosing related documents from the field, specifying recipients (Toes), writing the body text (with infinite paragraphs for expansion), and attaching files. Use the filtering option to search and sort documents by category.
Resources #
There are three types of resources: general Resources, shopping lists via Buy List, and reports via Resource Reports (where you can specify timing). Organize all resources using the Category tab in this section.

By clicking on Add Resource button you can Add a new resource by filling Name , Number , Resource Type , Unit , Cost , Overtime pay and if you want attach a category and a description.
after add a resource you can edit and delete the resource and by click on down angle you can look at the details
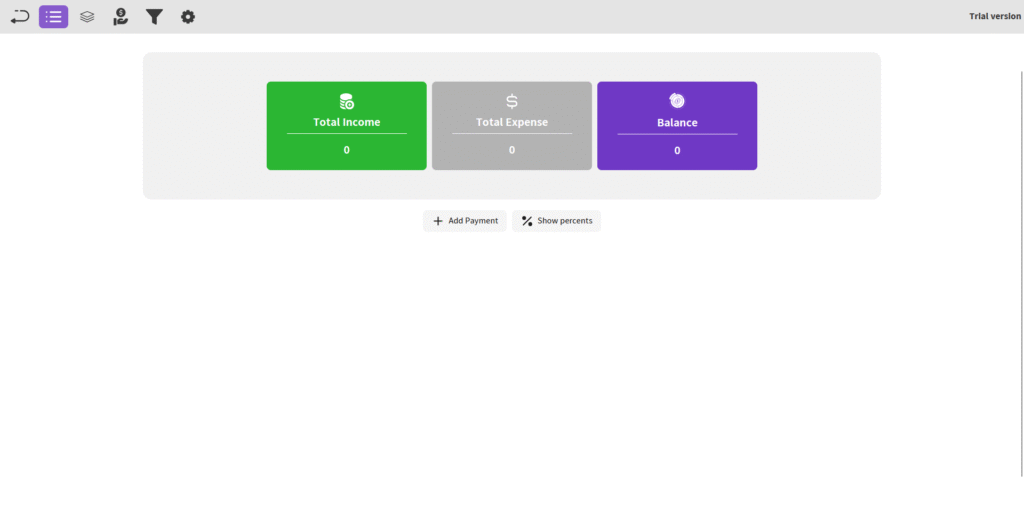
Financial Reports #
Manage your finances by entering Income and Expense entries, and view your Balance. To add, click Add Payment, input the details, add a Payment Description, and save. After adding, you can Edit, Delete, or view Details.
CRM #
Here, you can register person or company clients with their details: (first name, last name / Company name), phone numbers, emails, addresses, birth date, personnel, and description—click Send to save. Assign Trade tasks (e.g., “Sell iPhone 17 to client”) to team members for follow-up. After registration, add products/services for the customer/company, view interaction history, and manage ongoing records.
Charter #
In this key section, introduce your project with: Project Introduction, Project Epics, Project Goals, Project DODs (Definition of Dones), Project Personas, Project Limitations, Project Risks, Project Important Times, Project Rules, Project Shareholders, Project Suppliers, Project Legislators, Project Society, and Project Competitor.
Frequently Asked Questions #
Doitify Board #
How do I log a daily report in a Board ?
From Notices drop down in the sidebar, select “Report Daily Works,” enter your work details and time, then submit.
How do I leave a Board ?
click “Leave Board” in the Members section. Owners should first transfer ownership.
How do I change Board settings ?
From the left sidebar, open Project Settings drop down and click on options like General, Package, or Automation.
How do I use Chat and Discussion on a Board ?
Chat for real-time team messaging with timestamps; Discussion for topic-based threads—use Advanced for voice, photos, or private messages, with sidebar toggle.
How do I track progress on a Board ?
Two progress lines show completion: one by task count (e.g., 6% done), another by start time to last deadline for estimated finish—view granular subtasks for detailed breakdowns.
How do I add members or teams to a Board ?
Click on Share button in header or open Project Settings drop down in side bar and click on Members , click add new members , assign roles (task manager, QC), and set permissions—groups allow bulk duty assignment for employer management.
How do I set up sprint mode on a Board ?
Click Sprint Mode in the toolbar to filter tasks by deadlines and dates, set sprint duration, and track velocity—perfect for agile techniques
How do I set up sprint mode on a Board ?
Click Sprint Mode in the toolbar to filter tasks by deadlines and dates, set sprint duration, and track velocity—perfect for agile techniques
Can I customize columns on a Board ?
Yes, click the Columns button in a board to open “board column settings”, add/edit columns or COSs, reorder by dragging, and delete unnecessary ones—default columns like “Pend” can be expanded for statuses like active or completed.
How do I add tasks to a Board ?
In the Board view, click Text, Voice, or More in the top toolbar—use Text for quick entry, Voice for dictation, or More for advanced details like subtasks, deadlines, assignments, and attachments.
How do I create a new Board ?
Click the + New Board in the Board page in Dashboard, enter a name , choose if it’s a child of an existing board (for hierarchy), and click on Create Board — it auto-sets up default columns like “Pend” for quick onboarding.
What is a Board in Doitify ?
A Board is a visual workspace for organizing tasks, subtasks, and workflows using Kanban or COSs, enabling drag-and-drop management, status tracking (active, under checking by QC, rejected, completed), and integrations with CRM, Gantt charts, and reports.


